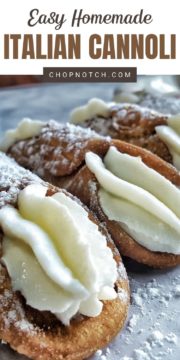
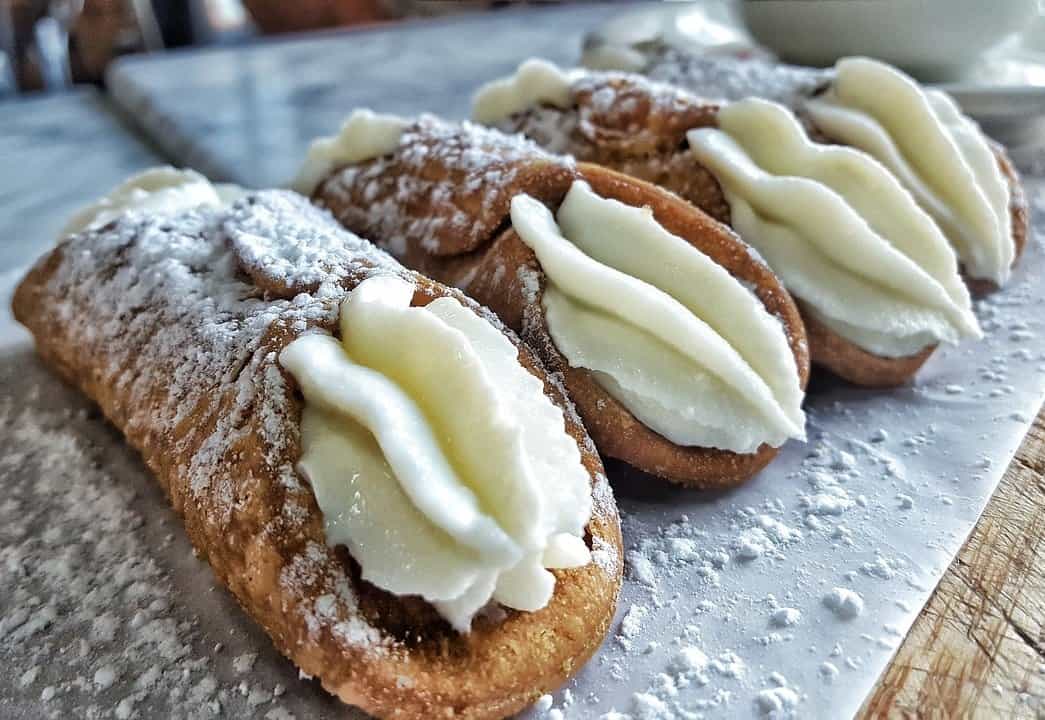
Homemade cannoli is even better than the kind you buy from an Italian bakery - and it only takes 6 ingredients and 15 minutes to make this delicious dessert!
Jump to:
This homemade cannoli has to be one of my favorite desserts ever. I love everything from the sweet, crumbly pastry to the rich creamy filling inside. You can flavor the cream filling however you want and experiment with different flavors. Homemade cannoli is fun to make and anyone will find this recipe easy!
This originally Sicilian treat is popular all over the world. Grab a package of premade cannoli shells as well as cream, ricotta, and some flavorings and you’re all ready to make this incredible Italian dessert. These are elegant enough for a fancy dessert when you have guests over.
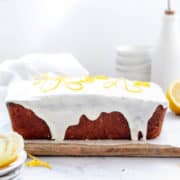
And if you want a few other ideas, check out this tiramisu and this panna cotta for more delicious Italian desserts!
Main Ingredients
Using premade shells really cuts down on the time and effort needed to make homemade cannoli and they don’t affect the quality or taste of the finished cannoli. Let’s take a look at what you need to make this exquisite Italian dessert:
- Cannoli shells: The vessel for the filling. Yes, you could make your own homemade cannoli shells, but not everyone has the time for that. Premade shells are a great shortcut. You can find these on Amazon if your local grocery store and bakery don’t carry them.
- Ricotta cheese: For the filling. Ricotta is used in plenty of Italian recipes from lasagna to homemade cannoli. Bear in mind, ricotta cheese has a lot of liquid in it, so you have to squeeze as much as you can out before filling the shells. If you don’t, the cannoli will be soggy.
- Confectioners' sugar: To add sweetness. You will need confectioners' sugar, also known as powdered sugar or icing sugar, to sweeten the filling. Regular sugar won’t work because it will be grainy and crunchy, so you do need to use the powdered kind.
- Heavy cream: For texture. Although some cannoli recipes thin the ricotta with mascarpone (another Italian cheese) heavy cream also works and is typically what I use since it thickens nicely in the blender.
- Vanilla extract: Vanilla is always good in desserts! As always, use real vanilla extract and not artificial vanilla essence for the best result.
- Lemon zest: For a hint of citrus. When paired with vanilla, lemon offers a light and delicate touch to homemade cannoli. For a different take on the recipe, try lime or even orange zest.
Instructions Overview
You will be pleased to learn the instructions for making homemade cannoli is very simple! Squeeze the liquid out of the ricotta first, then add it to a blender along with the sugar, lemon, vanilla, and heavy cream.
Blend the mixture until it is smooth, then spoon this filling into a piping bag or Ziploc bag with the corner cut off. Fill each shell with the ricotta mixture. Sprinkle a little confectioners' sugar on top of each one and serve!
Common Questions
This Italian dessert is usually served chilled so the filling holds together or it can be served at room temperature. This isn't a dessert that's served warm however. You can get it out of the refrigerator shortly before serving or else serve it directly from there. Either way it will be delicious!
If you make the filling ahead, bear in mind it won't last for long even when refrigerated. You can probably keep it in a sealed container in the refrigerator for a day or two but I wouldn't recommend any longer than that if you want fresh-tasting cannoli.
If cannoli sits for more than a couple of hours the cream starts to make the shell soggy. This can affect how safe it is to eat as well as how soggy or fresh it's going to seem. You can buy the shells and filling separately from the bakery or, better still, make your own easy homemade Italian cannoli and you will know exactly how fresh everything is.
All ricotta needs to be drained of liquid before making cannoli filling or else there will be too much liquid and your resulting cannoli will come out mushy which isn't what you want. Whether you're using homemade ricotta or the store-bought kind, I recommend you squeeze it through a fine mesh sieve or cheesecloth. You will be surprised how much liquid comes out. No sieve or cheesecloth? Try paper towels or a cloth napkin.
These terms are used interchangeably. However, in Italy they are typically known as Sicilian cannoli while outside of Italy either term can be used and refers to the same thing.
Cannoli can be prepared ahead but you will get the best results if you keep the filling separate from the shells and fill them just before serving.
Filled cannoli shells will keep for a couple of days in the refrigerator but after 24 hours they won’t taste as fresh or crisp.
If you try to freeze filled cannoli, the creamy filling will get into the pastry and make it soggy. You can freeze the filling by itself though, then thaw and fill the shells later.
Whether you enjoy your cannoli with an after-dinner espresso or as a mid-morning snack, there is no wrong way to serve this delicious treat. Just make sure they are served chilled so the filling holds its shape.
If your filling seems too thin, chill it in the refrigerator and it should thicken up. Alternatively, mix in some finely ground almonds or more confectioners' sugar.
Chopnotch Tips
- Strain the ricotta through a fine-mesh sieve before combining it with the other filling ingredients for a super-smooth filling.
- It’s best if you have a piping bag to get the filling inside your shells. If not, use a plastic Ziploc bag. Fill it up and then carefully cut off a corner for a DIY piping bag.
- Serve the filled cannoli within 24 hours if possible, otherwise, you will find the shell gets soggy. If this isn’t possible then just keep the filling and shells separate until serving.
- Feel free to add more extras to these. Anything from chopped pistachios to chocolate chips will work in the filling, so get creative! Last time I added some blackberries to the blender to add fruit flavor and color the creamy filling as well.
- Don’t forget to save some of that confectioners' sugar to top off your cannoli! It always looks perfect with a light dusting.
Homemade cannoli is so easy to make and if you use premade shells it only takes 15 minutes! These delicious treats are perfect for any occasion.
Related Recipes


Let us know what you think! Give this recipe a rating in the comments section below.
Recipe
How to Make
Homemade Cannoli

Ingredients
- 8 pre-made cannoli shells
- 15 ounces whole milk ricotta cheese, excess liquid squeezed out
- ½ cup confectioners’ sugar
- 1 teaspoon lemon zest
- ½ teaspoon vanilla extract
- 4 tablespoons heavy cream
Instructions
- Place ricotta into a blender. Add confectioners' sugar, lemon zest, vanilla, and heavy cream. Blend until completely smooth.
- Spoon filling into a disposable piping bag, cut the corner off and fill each cannoli.
- Serve topped with confectioners' sugar.
Notes
- Strain the ricotta through a fine-mesh sieve before combining it with the other filling ingredients for a super-smooth filling.
- It’s best if you have a piping bag to get the filling inside your shells. If not, use a plastic Ziploc bag. Fill it up and then carefully cut off a corner for a DIY piping bag.
- Serve the filled cannoli within 24 hours if possible, otherwise, you will find the shell gets soggy. If this isn’t possible then just keep the filling and shells separate until serving.
- Feel free to add more extras to these. Anything from chopped pistachios to chocolate chips will work in the filling, so get creative! Last time I added some blackberries to the blender to add fruit flavor and color the creamy filling as well.
- Don’t forget to save some of that confectioners' sugar to top off your cannoli! It always looks perfect with a light dusting.