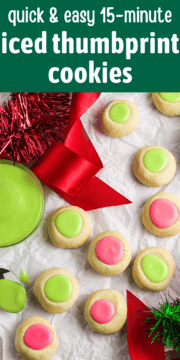
Perfect little treats for Christmas, these cute iced thumbprint cookies are easy to prepare. You need just 5 ingredients for the cookies and 4 for the icing.

Jump to:
I love making green and red icing for Christmas cookies, but you can also frost them orange for Halloween or pink for Valentine’s Day.
This is a fun recipe to try with small kids who love making thumbprints on everything anyway! Every cookie is unique, which is why they’re so special. Iced thumbprint cookies suit any season or occasion and of course taste great!
If you make these quite small (well, just a little bigger than your thumb) you will get about 50 cookies from the dough. Whether you fondly remember these from your childhood or you’ve never had them before, you’re going to love this quick and easy recipe.
Eggnog bread pudding and these delicious Christmas sugar cookie bars are two of my other favorite festive dessert recipes that I always bake every winter. I recommend that you give them a try too!
Main Ingredients
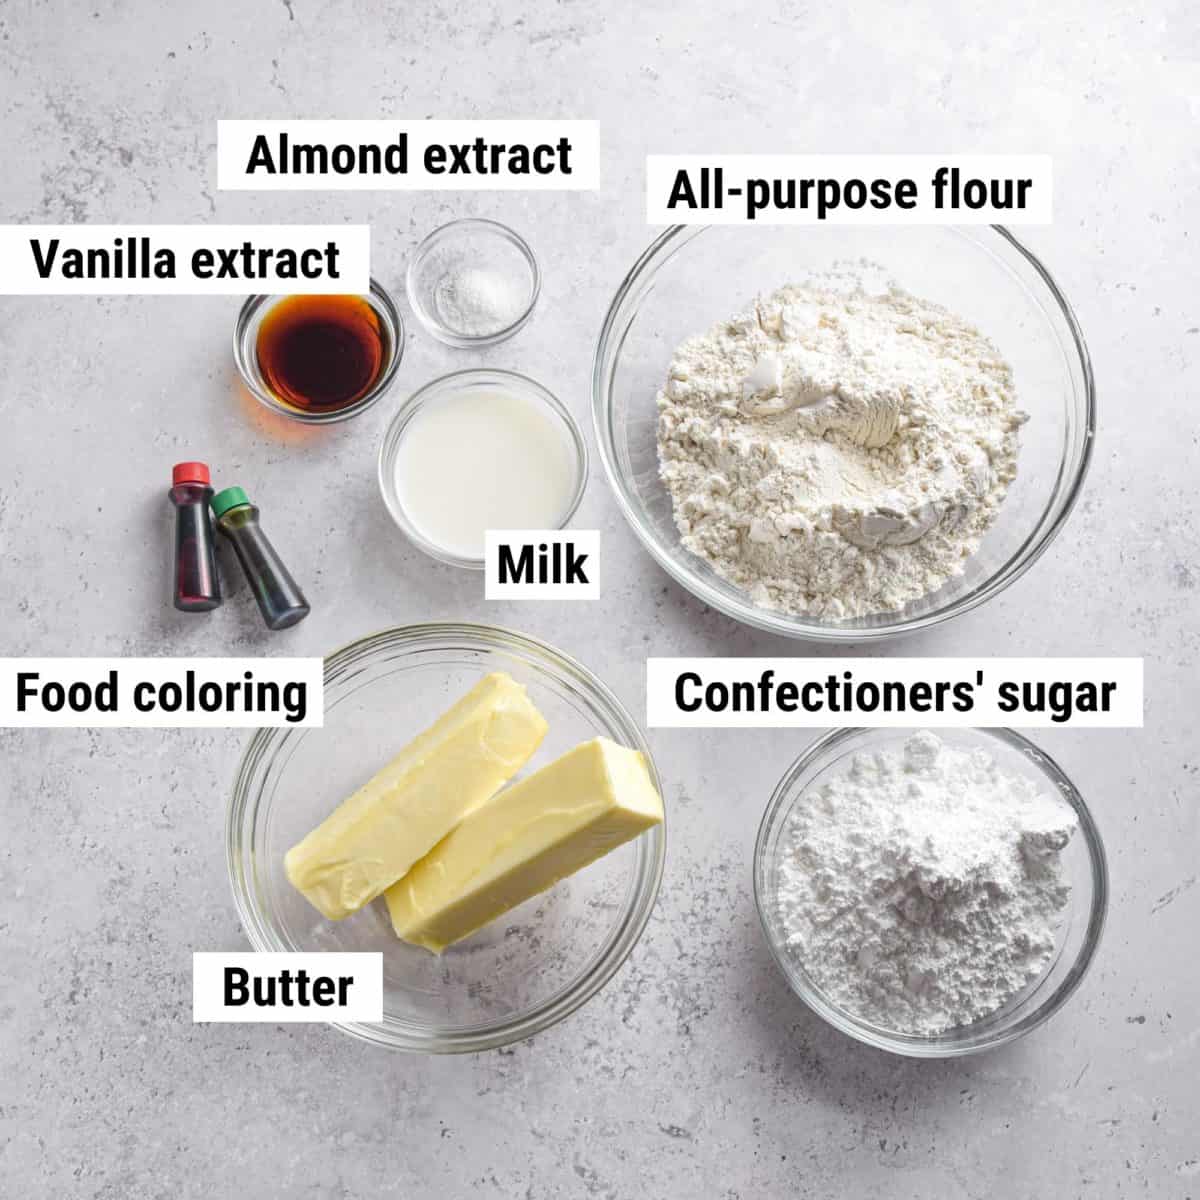
These little treats include all the cookie-making staples you’d expect along with some vanilla and food coloring. I bet you already have most of the ingredients in your pantry. Let’s take a look at some of the key ingredients in these yummy, thumbprint-shaped sweets:
- Confectioner’s sugar: For sweetness. This ingredient, also known as powdered sugar or icing sugar, is used for sweetness in the cookie dough. It’s also used in the icing since granulated sugar wouldn’t dissolve properly.
- Vanilla: For a delicate flavor. Like the confectioner’s sugar, this ingredient also goes into both the dough and the frosting. Vanilla is a lovely flavor for these cookies, but if you want to try another flavor extract go ahead! Try something like coconut, hazelnut, or orange extract. The flavor of these cookies is very neutral before adding the extract, so choose whichever you want here. As usual, I recommend using pure extracts for the best-tasting result.
- Milk: To bind the icing ingredients. Use any kind of milk you want. I used regular full-fat milk, but you can use 2% or any non-dairy milk instead.
- Food coloring: To color the icing. This is where you can have fun, choosing any colors you want to use! I use half red and half green when making Christmas iced thumbprint cookies. Choose from gel or liquid food coloring. Either will work, although a few drops of gel will give the same result as a teaspoon of liquid color because it’s more intense in color.
Instructions Overview
Ready to make your own cookies? The first thing you’ll want to do is combine the sugar with butter, salt, and vanilla until creamy. Next up you can add the flour and mix until only just incorporated. Refrigerate the resulting dough for an hour.
Make small balls out of the dough and arrange them on baking sheets. Press each one with your thumb to make thumbprints and bake until golden. Let them cool down while you work on the icing.
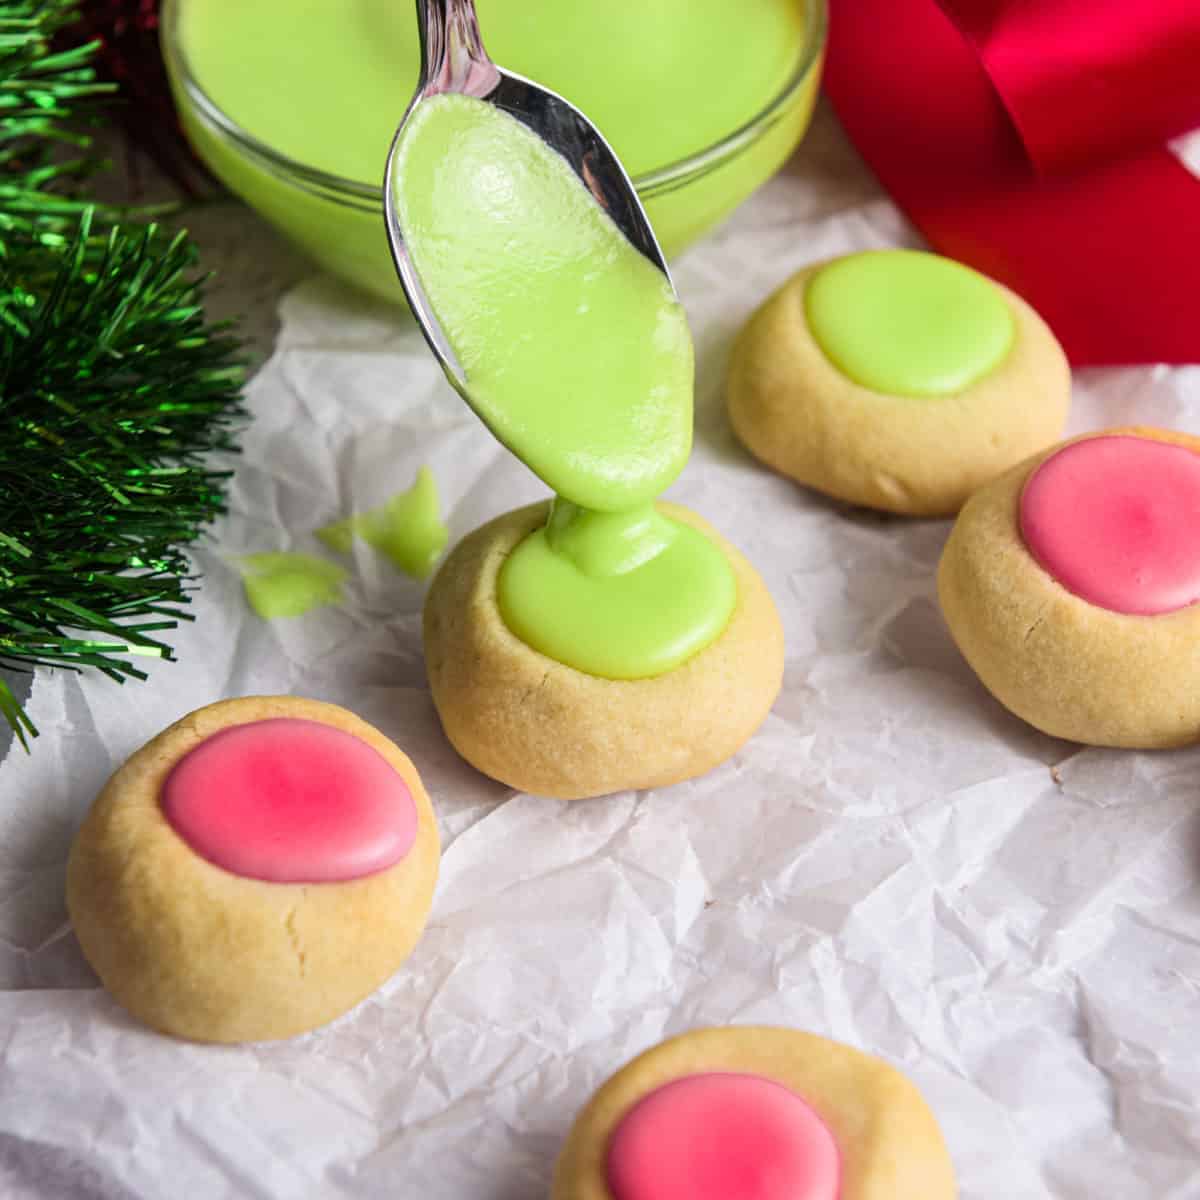
Combine the sugar, vanilla, and milk for the icing. You might need to add more icing sugar or milk depending on if it’s too thick or too thin. Next, add some food coloring and mix. Add a little more and repeat until your icing is the color you want.
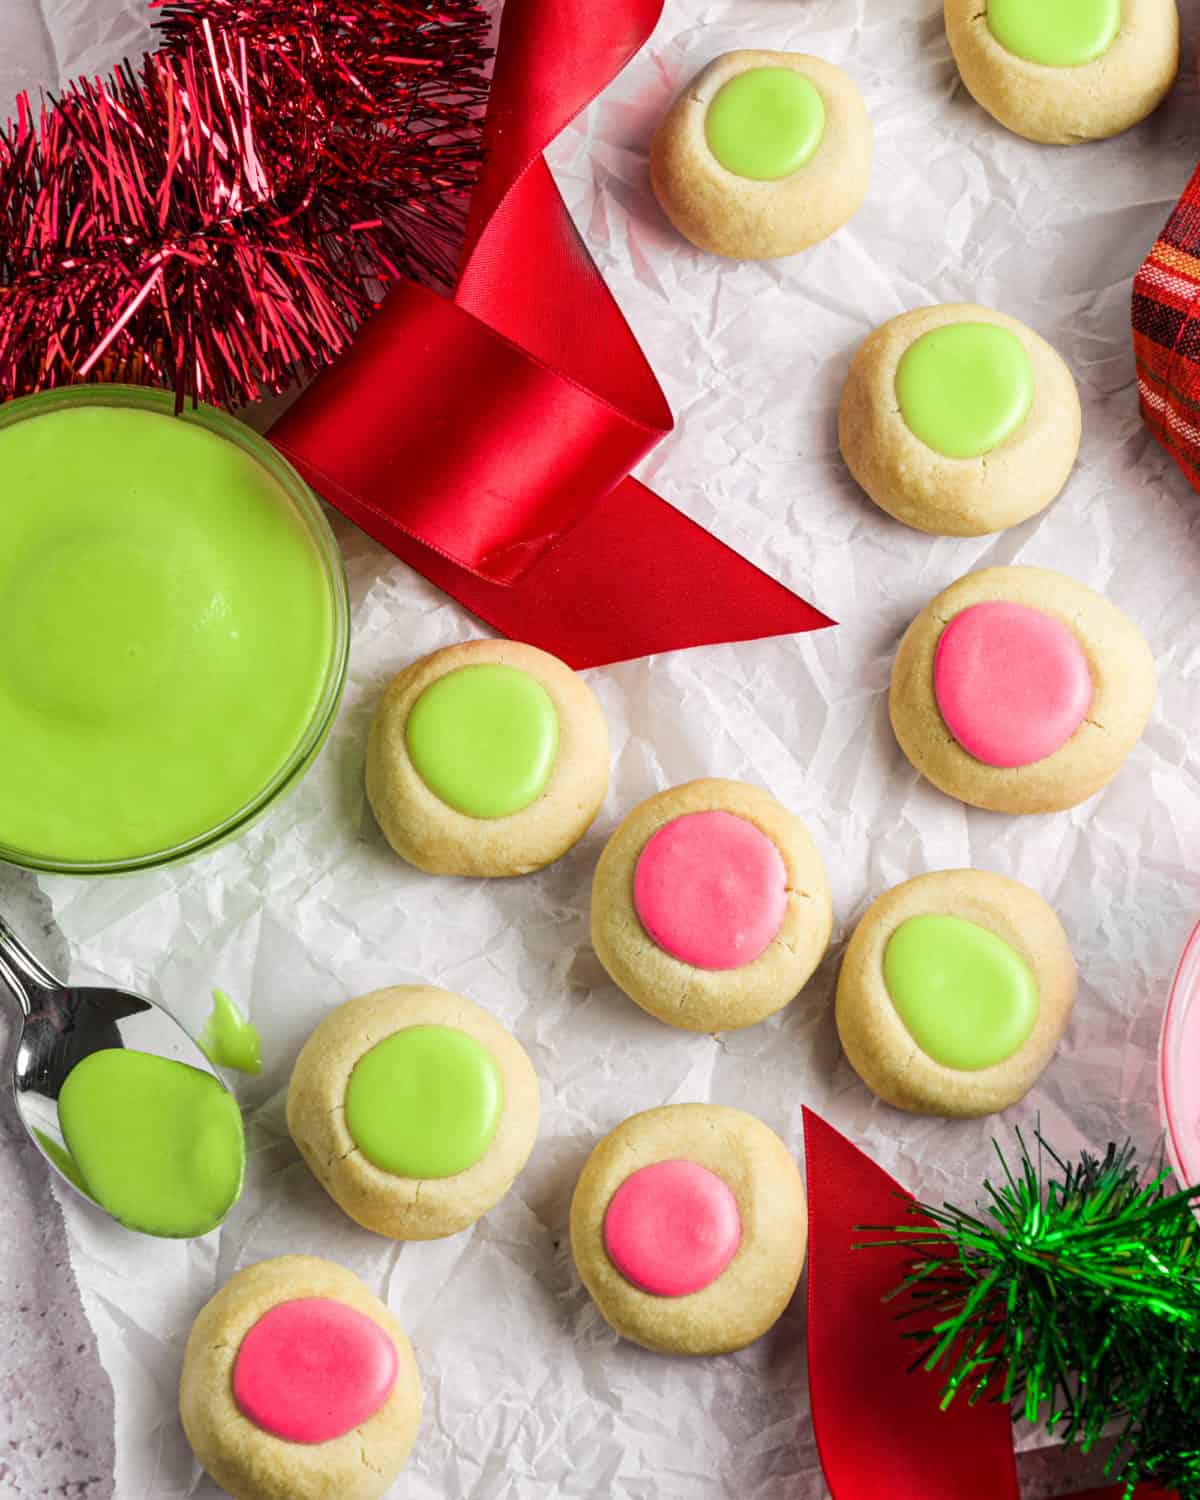
Once the cookies are completely cool you can begin spooning the colored icing into the thumbprint of each one. Let the icing set and then they’re ready to serve.
Common Questions
This happens when the fat in the dough melts. If there isn’t enough flour to soak it up they will spread too much, so make sure you measure out your flour carefully. They will spread slightly anyway, so arrange them a few inches apart on the baking sheet before baking.
This depends on the recipe you’re using. If you’re filling them with something like jam or preserves, you will usually add this before baking. However, with these iced thumbprint cookies, the frosting is added to them after they have baked and fully cooled.
Keep them in an airtight container on the countertop. You don’t need to refrigerate them. They should stay fresh for up to a week. Another idea is to make these ahead and bake them, then fill them after thawing. Don’t make the icing or ice them until they have fully thawed.
Chopnotch Tips
- Leave the butter out for half an hour before you start. If it’s soft then it will blend better into the dough.
- If you want to make these extra small, you can use a fingertip instead of a thumb for the indentation.
- Add a little cocoa powder to the dough if you want to add a chocolate flavor.
- If you chill the dough for more than an hour, that’s fine, but you might have to roll it in your hands a bit to make it soft enough to shape.
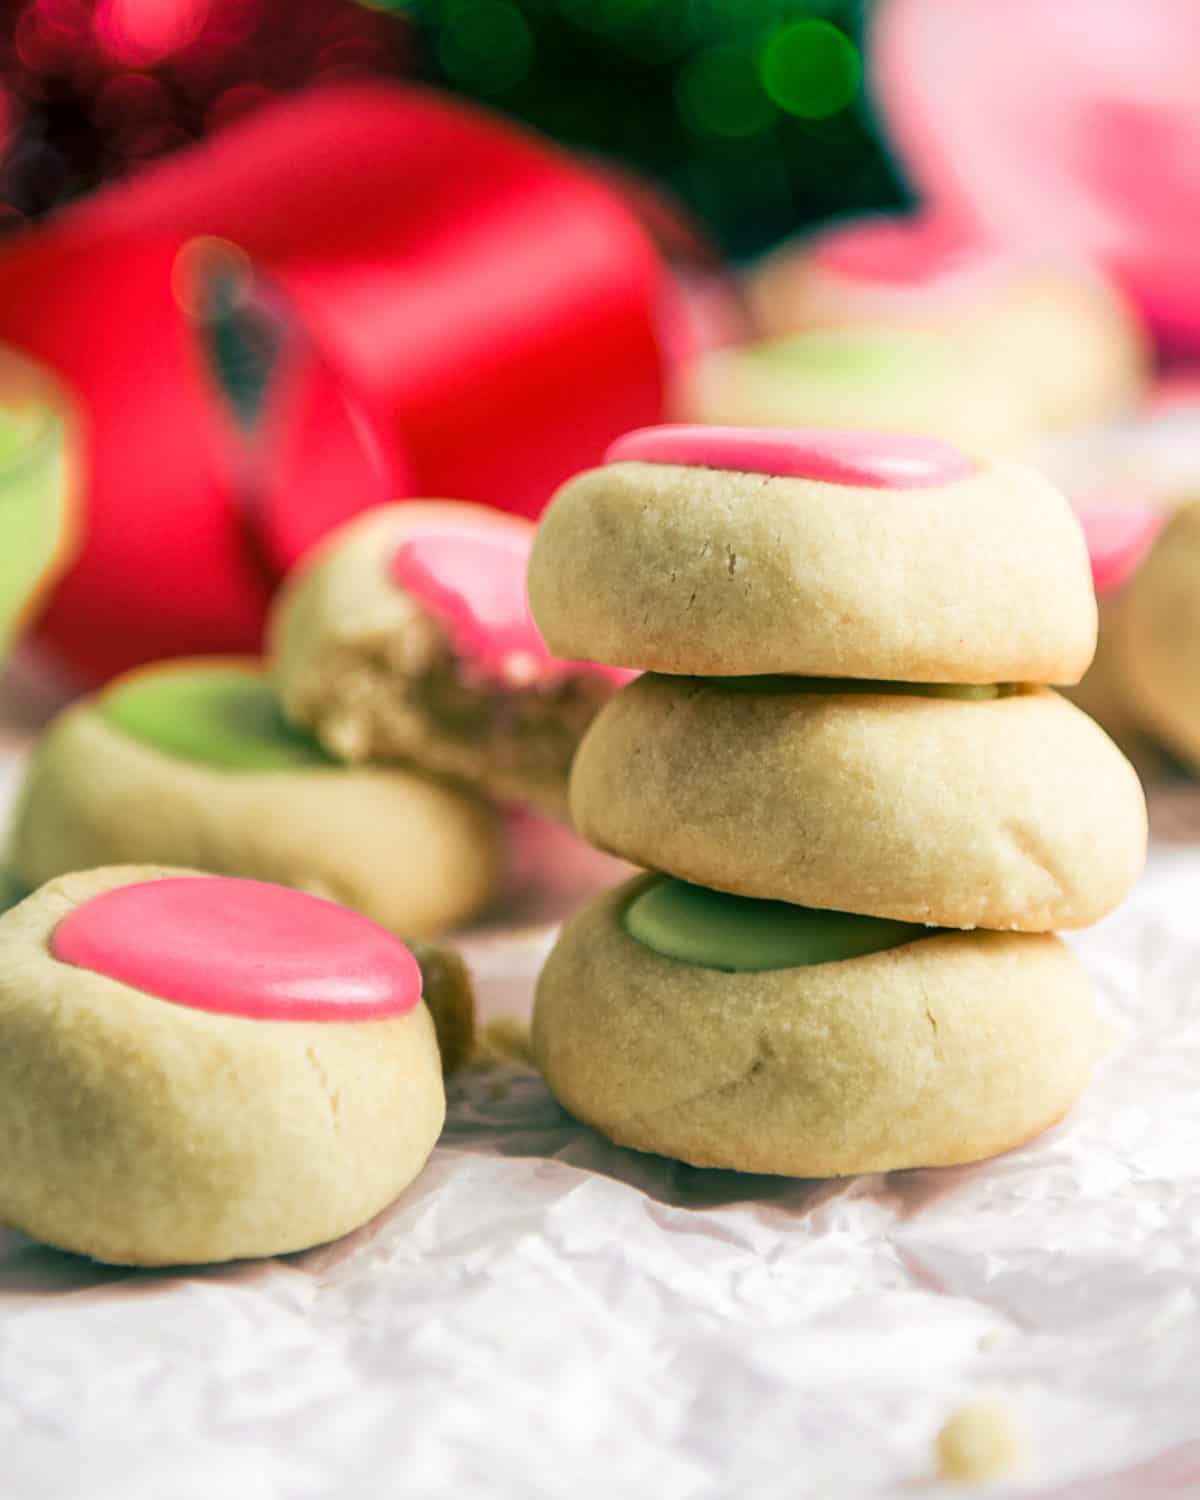
Iced thumbprint cookies are one of the cutest cookie recipes you can make! They’re also super-easy. The cookies are soft and the icing is sweet. They are delightful to bite into!
Related Recipes


Let us know what you think! Give this recipe a rating in the comments section below.
Recipe
How to Make
Iced Thumbprint Cookies

Ingredients
For the cookies:
- ½ cup confectioners’ sugar
- 1 cup unsalted butter, softened
- ½ teaspoon salt
- 1 ½ tablespoon vanilla extract
- 2 cups all-purpose flour
For the icing:
- 2 cups confectioners’ sugar
- 1 teaspoon vanilla extract
- 4 tablespoons milk
- food coloring, any color(s) of your choice
Instructions
To make the cookies:
- Combine the sugar, butter, salt, and vanilla extract in a large mixing bowl and beat until you have a creamy consistency. Then mix in the flour until well combined without overmixing. Transfer the bowl to the refrigerator to let the dough chill for at least 1 hour.
- Once chilled, preheat the oven to 350°F and then remove the dough from the refrigerator. Form small balls and place them onto ungreased baking sheets at least 3 inches apart, and then press your thumb into the center of each one to make a thumbprint.
- Bake for 12 minutes or until lightly browned and then let them cool to room temperature.
To make the icing:
- In a large mixing bowl, mix the sugar, vanilla, and milk together until smooth. If the icing is too runny, add a bit more confectioners’ sugar. If too thick, add a bit more milk. Mix a few drops of food coloring in until you achieve the color you desire.
- Once the cookies have cooled completely, spoon the icing into each thumbprint. Once the icing has set, serve and enjoy!
Notes
- Leave the butter out for half an hour before you start. If it’s soft then it will blend better into the dough.
- If you want to make these extra small, you can use a fingertip instead of a thumb for the indentation.
- Add a little cocoa powder to the dough if you want to add a chocolate flavor.
- If you chill the dough for more than an hour, that’s fine, but you might have to roll it in your hands a bit to make it soft enough to shape.


Can these be frozen?
Hi Charlee, yes these can be frozen. Wrap them individually, place in an airtight container, and freeze!
Love the recipe. Taste delicious. Why does my icing never totally solidify. Do I need more confectioners sugar?
Thanks, Tracy! Glad you love the recipe. Yes, you can try a little more confectioners' sugar. Let them sit on the counter at room temp overnight. It should harden up by the morning!